The "Edit in App" feature lets you build and configure product tours directly within your live application using a visual, point-and-click interface. Instead of manually writing CSS selectors, you can select elements and configure tours right where they'll appear.
What is Edit in App?
Edit in App is a visual tour builder that opens your application with special editing capabilities enabled through the Userorbit Chrome Extension. You can:
Select elements visually by clicking on them
Position tooltips with real-time preview
Configure step settings with immediate changes
Navigate multi-page tours in actual user flow
Test tour behavior in real environment
Prerequisites
1. Userorbit Chrome Extension
Install the extension:
Visit the Userorbit Chrome Extension page
Click "Add to Chrome"
Pin the extension to your toolbar
2. Application URL
You'll need the URL of your application where you want to build the tour (e.g., https://app.example.com/dashboard).
3. Application Access
Application must be accessible in browser
Be logged in if authentication required
Application should be in stable, testable state
How to Use Edit in App
Understanding the App URL Modal

When you click "Edit in App", a modal dialog appears asking for your application URL. This is where your tour will be built and tested.
What to enter:
Full URL of your application (e.g.,
https://app.example.com)Specific page where you want to start building
Best practices:
Use exact URL where users will see tour
Start at first page of tour flow
Ensure you're logged in before starting
Don't use localhost URLs for production
Avoid URLs with temporary parameters
Opening the Visual Builder
Navigate to your tour in Userorbit dashboard
Click "Edit in App" button
Enter your App URL in the modal
Click "Start tour builder"
New browser window opens with your application
Tour builder panel appears on the right side
Selecting Elements
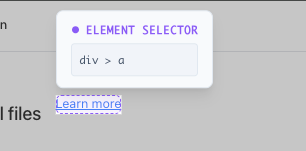
When attaching tooltips to elements:
Click "Select in app" for CSS Selector field
Hover over elements (they highlight in blue)
Click the element you want to select
CSS selector automatically generates
Selection tips:
Choose stable elements (avoid dynamic IDs)
Select parent containers for reliability
Hover carefully for precise selection
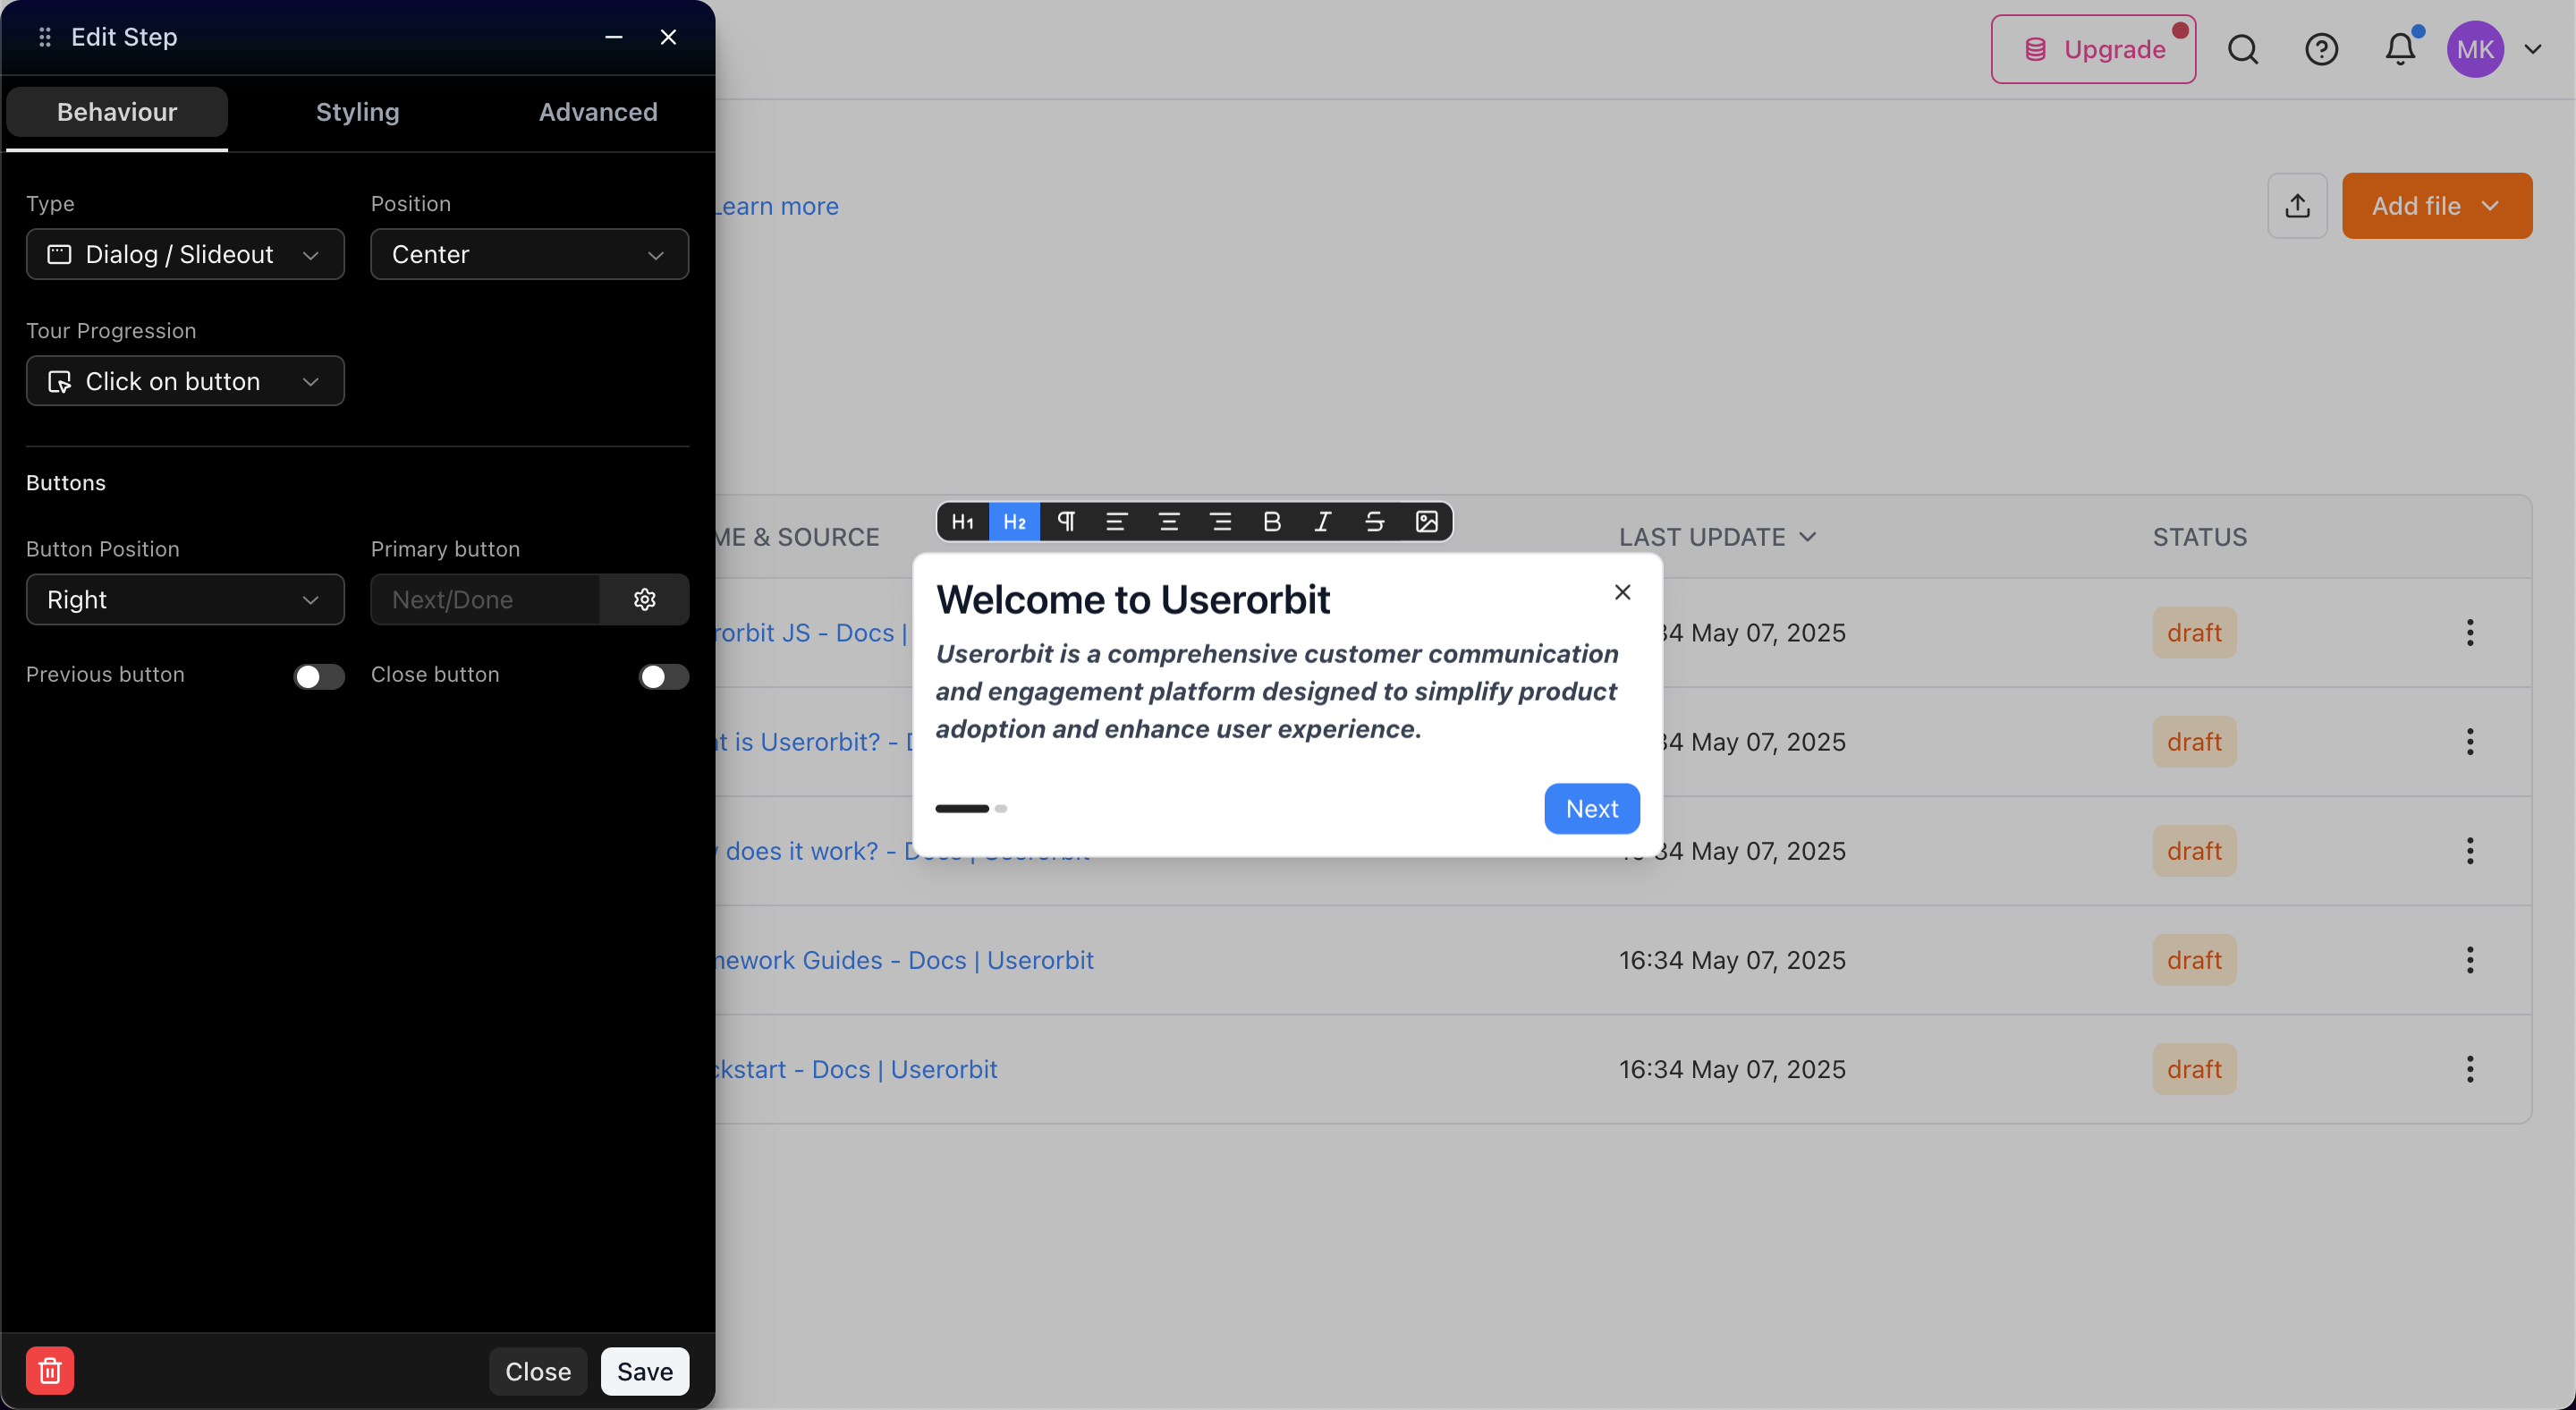
Configuring Steps Visually
Step Type & Position:
Select step type (Dialog, Tooltip, Banner)
Choose position (top, bottom, left, right, auto)
See instant preview
Content Editing:
Edit content in builder panel
Changes appear in real-time
Adjust text, buttons, formatting visually
Styling & Theme:
Customize colors, fonts, spacing
See immediate visual feedback
Test different styles without saving
Working with Multi-Page Tours
Start editing in app
Configure first step
Navigate to next page in your application
Click "Add Step" in builder
New step automatically configured for current page
Repeat for each page
Best practice: Follow actual user journey through your app while building.
Previewing Tours
Click "Preview" in builder panel
Tour plays as users will see it
Navigate through all steps
Test buttons and interactions
Verify positioning on different screen sizes
Edit in App Interface Overview
Builder Panel
Step Navigator: Switch between steps
Content Editor: Edit with rich text
Behavior Settings: Configure type, position, progression
Styling Options: Customize appearance
Advanced Settings: Set URLs, delays, behaviors
Selection Mode
Blue Highlight: Selectable elements
Selection Tool: Active when selecting
CSS Path Display: Shows selector for current element
Top Toolbar
Save: Save tour changes
Preview: Test tour as users see it
Close: Exit builder (prompts for unsaved changes)
Common Use Cases
Creating Feature Announcements
Click "Edit in App" on your tour
Navigate to new feature
Select feature element visually
Add tooltip explaining feature
Preview and save
Building Onboarding Flows
Start at app entry point
Add first step introducing interface
Navigate following user journey
Add subsequent steps
Test complete flow
Configuring Complex Tooltips
Select target element visually
Choose tooltip position (auto recommended)
Add content in editor
Adjust styling to match app
Test on different screen sizes
Tips for Effective Visual Editing
Element Selection Best Practices
Choose stable selectors:
Use consistent class names
Select semantic HTML elements
Prefer ID-based selectors when available
Avoid dynamic generated IDs
Don't select temporary elements
Positioning & Layout
Tooltip positioning:
Test on different screen sizes
Ensure tooltips don't cover critical UI
Use "auto" position when possible
Content & Styling:
Write content while viewing in context
Use app's color scheme for consistency
Test readability on actual backgrounds
Troubleshooting
App URL Modal Issues
Can't enter URL:
Click input field to focus
Use complete URL with
https://Refresh page and try again
Button not working:
Ensure valid URL format
Check popup blockers
Use Chrome browser
Extension Issues
Extension not responding:
Check extension installed and enabled
Refresh application page
Try reinstalling extension
Element Selection Issues
Can't select element:
Element may be hidden/covered
Try selecting parent container
Use browser DevTools to inspect
Wrong element selected:
Hover more carefully
Zoom in for small elements
Select parent or child element
Tour Issues
Tour doesn't show:
Verify App URL is correct
Check page URL matches step pattern
Ensure elements exist on page
Positioning problems:
Try "Auto" position for tooltips
Add delay if element loads after page
Test on actual user screen size
Best Practices
Before Starting
Plan tour flow - Map user journey
Know App URL - Have exact URL ready
Test app - Ensure stable state
Prepare content - Draft messaging
Use Chrome - Required for extension
During Editing
Save frequently - Don't lose work
Preview often - Test after each change
Use consistent styling - Apply theme globally
Follow user path - Navigate as users would
After Building
Test thoroughly - Preview complete tour
Check screen sizes - Resize and test
Verify URLs - Steps appear on correct pages
Get feedback - Team review before publishing
Monitor analytics - Track completion rates
Security & Privacy
Edit in App is designed with security in mind:
Temporary tokens - Expire after editing session
No data collection - Don't capture app data
Local processing - Selection happens in browser
Secure communication - Encrypted data transit
Wrapping Up
Edit in App transforms tour creation from guesswork into visual, intuitive experience. Build tours directly within your application to:
Create accurate, pixel-perfect positioning
Build multi-page flows following actual user journey
Iterate quickly with real-time preview
Reduce errors from manual CSS entry
Test in exact user environment
The visual builder eliminates technical barriers, letting you focus on crafting helpful, engaging user experiences.
Key takeaways:
Visual selection eliminates CSS guesswork
Real-time preview shows exactly how tours appear
Multi-page support follows actual user flows
Chrome extension enables seamless editing
Instant feedback speeds up iteration process
Next steps:
Use Edit in App to visually configure your steps
Need help getting started? Contact our support team or click the chat bubble below for personalized assistance.
Happy building!